4.
INSPECTION, HANDLING, CLEANING, REPAIR
4.1 PREPARATION
4.2 BEFORE YOU UNWIND
4.3 INSPECTION & REPAIR
4.4 CLEANING
The assessment of
the film's condition is key to predicting the remaining useful life of
the film. Already degraded or damaged films require even more stringent
climate conditions than new film to achieve the same life span. Determination
of shrinkage and damage is necessary for the prevention of further damage.
In cases of serious damage or deterioration, contact the nearest film
archive, or consult one of the professional organizations listed in the
Resource section.
4.1 PREPARATION
Materials list for
film handling and repair:
- Lint-free cotton
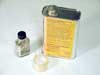
cloth

- Film cleaner
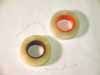
- Splicers (tape
and/or cement)

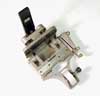
- Splicing tape or
film cement
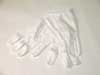
- Cotton gloves
- Acetate or polyester
film leader (new)
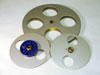
- Archival cores
and cans
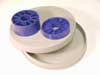
- Split-reels
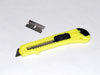
- Razors
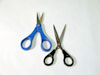
- New pair plastic handled
scissors
- Acid-free paper
tape (artist or museum tape)
- Loupe or magnifying
glass (or old projector lens)

- Light table and
rewinds

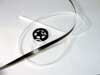
- A-D strips

- Perforated tape
- Molecular sieves
- Dust mask
Before you
begin:
You will need a clean work area. A light table is very useful
and fairly easy to make or procure. You should work on an uncluttered
table with rewind shafts and plenty of light. It is a good idea to cover
your work area with a clean towel to avoid abrasions caused by the film
coming into contact with the tabletop. Clean your metal equipment (splicers,
etc.) with 100% alcohol, available at hardware stores. Don't use alcohol
solvent. If you have to, use 90% (the other 10% is water, available at
pharmacies), making sure to clean off the metal parts so as not to invite
rust. Counters and plastic equipment may be cleaned with distilled water.
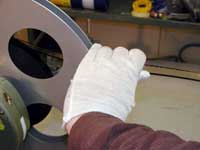
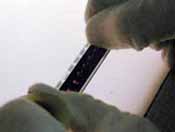
When handling film,
wear cotton gloves and wash your hands often. Gloves may be problematic
if the film has many tape splices (they may leave fuzz on the tape) or
damaged edges (they may tear the film). Handle film only by the edges.
If you need to touch the image or soundtrack area, put on gloves. Your
skin produces oils that you don't want to get on the film. If you do touch
the film, you will leave fingerprints. Always remember that film is easy
to tear, and you should take care when working with it.
4.2 BEFORE
UNWINDING
Look
Before unwinding any film, look at the edges. Mold sometimes attacks film,
especially if it has been stored in a damp environment. If mold appears
on the edge of the film, clean it off by putting film cleaner on a soft
cloth and wipe gently with the direction of the film. If your film is
moldy throughout, you may consider having it cleaned at a lab. Some types
of mold eat the emulsion, and will take the image off your film. Be careful
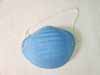
not to inhale the mold spores, as they can make you sick. If the film
is quite moldy, you should consider wearing a dust mask. Hardware stores
often sell disposable masks with specific filters for different problems
(mold, fumes, etc.). Be sure to wipe down all your equipment after dealing
with mold, so it will not spread to your other films.
It is a good idea
to clean the edge of the film, even if it isn't moldy, before winding
through it and to remove all the dirt you can before it gets on the picture
area.
Smell
Smell the film. An odor of camphor (mothballs) is common to
di-acetate film from the 1920s & 1930s and is not an indication of
decay. Camphor may also have been used to keep tri-acetate film from drying
out and becoming brittle. Decaying acetate film smells like vinegar. If
a vinegar smell is present, deterioration is well underway, and the film
should be segregated from other "healthy" reels, and be given
top priority for cold storage or film-to-film preservation. A more accurate
assessment of acetate decay can be determined using A-D Strips, which
are dye-coated paper strips designed to measure the presence of acetic
acid off-gassing in a roll of film (like
litmus paper).
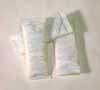
In the case of vinegar
syndrome, the film can be hand cleaned as described previously and stored
with molecular sieves or silica gel. Molecular sieves are similar to packing
desiccants. The packets are stored along the outside circumference of
the film reel (inside sealed film cans) to absorb moisture, acetic acid
and other contaminants.
More information
about molecular sieves can be found in the Kodak publication Molecular
Sieve Acid Scavenger from Kodak for Moisture Free Film Storage and Extended
Dye Images, which is available
online.
If the film is stored
under normal room conditions, providing colder storage temperature should
be considered. Colder and dryer storage conditions would efficiently postpone
further decay such as vinegar syndrome and color dye fading.
4.3 INSPECTION
& REPAIR
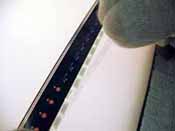
 Wind through the film slowly, keeping the tips of your fingers
on both edges of the film, so you'll be able to feel any perf damage.
Carefully remove any foreign objects such as masking tape, scotch tape
(non-archival tape contains acidic glue which will react with the film
and initiate deterioration), paper clips or staples. Clean any glue/sticky
residue off with film cleaner on a lint-free cloth and replace the splice,
using clear, professional splicing tape. Make sure the edges are cleanly
cut. Use your new scissors or a razor to trim the edges of the tape splice.
If you are not sure if the old splice was made with professional tape
or not, go ahead and replace it. Taking apart old splices (and especially
old masking tape) is sometimes difficult, and film cleaner may be used
liberally to loosen the tape.
Wind through the film slowly, keeping the tips of your fingers
on both edges of the film, so you'll be able to feel any perf damage.
Carefully remove any foreign objects such as masking tape, scotch tape
(non-archival tape contains acidic glue which will react with the film
and initiate deterioration), paper clips or staples. Clean any glue/sticky
residue off with film cleaner on a lint-free cloth and replace the splice,
using clear, professional splicing tape. Make sure the edges are cleanly
cut. Use your new scissors or a razor to trim the edges of the tape splice.
If you are not sure if the old splice was made with professional tape
or not, go ahead and replace it. Taking apart old splices (and especially
old masking tape) is sometimes difficult, and film cleaner may be used
liberally to loosen the tape.
If a mag track film
has been stored in a damp environment, when you wind through it, do so
VERY slowly. The mag stripe can peel off and stick to the opposite round
of the reel. If you wind through too quickly, you can split the film right
down the middle. If this happens, use splice tape lengthwise to repair
the damage. Don't tape over the sprocket holes except at the point where
they are torn. Tape both sides of the film. Store the film tails-out.
Check all old splices for strength by rotating the splice in opposite directions to see if both sides of the splice hold. Old cement splices can remade without losing any frames, but if you are not sure you can do this, tape splicing is acceptable.
 To
remove old splice and tape residue, film cleaner can be applied using
a lint-free cotton cloth or cotton swabs. Torn frames may be repaired
with splicing tape. Lining the pieces up on a light table and taping them
down, punching out the sprocket holes on a splicer later, may be the best
way to avoid seeing the tear on screen, but it is difficult.
To
remove old splice and tape residue, film cleaner can be applied using
a lint-free cotton cloth or cotton swabs. Torn frames may be repaired
with splicing tape. Lining the pieces up on a light table and taping them
down, punching out the sprocket holes on a splicer later, may be the best
way to avoid seeing the tear on screen, but it is difficult.
Sprocket hole ("perf")
damage may be repaired with small pieces of splicing tape, on just the
edge of the film (don't tape over the image if you don't need to), and
punched out with a splicer. You may also use perforated tape, which only
goes on the perforated edges of the film. Pre-punched perforation repair
tape is available for 16mm and 35mm film. Tapering the breaks with a new
cut in the edge of the film is also a good way to avoid further damage.
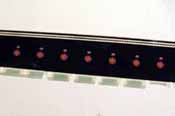
Visually inspect the
image for signs of color fading. This is irreversible and due to improper
storage conditions, inferior film stock, or poor processing. Color film
manufactured in the 1970s is notoriously prone to fading and may not be
a sign of storage problems or deterioration. It is wise to consider all
chromogenic color films, including the apparently most chemically stable,
as fast decaying materials. Poor storage conditions will ultimately lead
to color fading at an unacceptable rate. Providing proper storage should
be a priority to preserve film.
Organic film base
often shrinks with age and deterioration. It is not always easy to
tell
by looking at it whether or not it is shrunken (although severely warped
and curled film is a tip-off). One indicator of shrinkage is that
the
perforations will not match properly with the registration pins of a
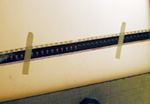
splicer. To get a more accurate measurement of a film’s shrinkage,
compare some new leader in the gauge of your film with the original
film. If the
holes do not line up perfectly, your film is shrunken. For 8mm film it
is easy to use a strip of 100 frames--if the original film is short
by
one entire frame, the film is shrunken by 1%. Film shrunken by more than
1% should not be projected, as the projector’s sprockets or
claw will damage it. Shrinkage gauges are available, but they are
expensive.
If your film is too
deteriorated or shrunken to project, you will probably want to save it
for copying. If you don't have the money to get it printed soon, consider
freezing it (see section 8.2)
to slow down the decomposition process quite a bit, giving you time.
Hand-painted or artfully scratched films should be treated with extreme delicacy and labeled clearly to ensure that no film cleaner will ever be used on them. This is very important if the film is to be sent to a lab for copying. If the lab doesn’t know what they’re dealing with, they could inadvertently destroy the film.
4.4 CLEANING
(only after a full inspection)
If the film is dirty or moldy, it can be cleaned gently by hand
using a lint-free cotton cloth and professional motion picture film cleaner.
Don't use this method if there is perf damage. Put the film cleaner on
the cloth and run the film between the folded cloth, holding it firmly
with your fingers. Wind slowly through the film so the film cleaner has
evaporated before it is wound onto the take-up reel. It is important not
to use water or any other fluid on film, as they could remove the emulsion.
Use the film cleaner cautiously: wear clean rubber (not latex) gloves
(dishwasher style, not powdered medical gloves), and clean the film in
a well-ventilated area. Use only a clean soft cotton cloth that will not
scratch the film. Replace the cloth as soon as there is a noticeable build-up
of dirt on it.
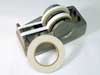
Film can also be cleaned by use of particle transfer rollers (PTRs). These
are polyurethane rollers that either come as separate units or as parts
of other machines (such as 35mm projectors). The rollers have a tacky
coating that removes larger particles of dust and hairs from the film
surface, and can be washed clean with water. They are expensive and probably
not sensible for small collections.